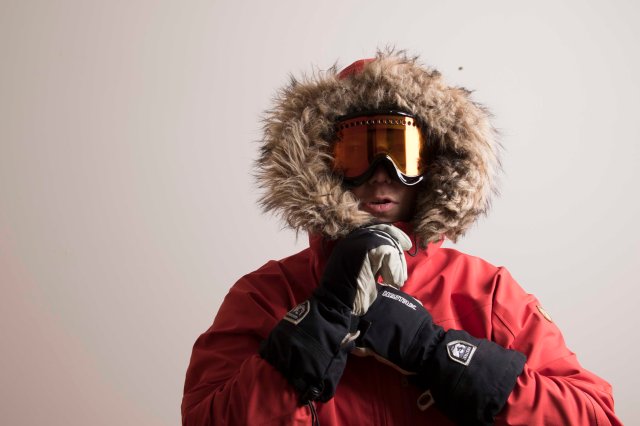
Here are some tips on how todress forcold weather.It is thelayer on layer methodthat I have applied.I takeinto accountclothes that I haveexperience of and thatIthinkhas worked wellin cold weather. I have divided thesubjectinto four main topics:
1) base layer, 2) mid layer,
3) outer shell layer (including accessories) and
4) the outer insulation layer.
Below you’ll find detailed explanations and photos about the different layers.
1) Base layer
The idea of the base layer is to keep you warm and dry. Therefore I use merino wool underwear. The merino wool absorbs moisture without feeling wet on you. Merino has also antibacterial properties, resulting in reduced body odor, so you can wear the garments for multiple days in a row. For winter conditions I use a relatively thick base layer: The Devold Expedition two-layer wool underwear. I like the zip neck model so you canventilate more easilyifit gets too hot. I also use merino on my feet. In the picture I have Lorpen’s Merino Liners as base layer.
2) Mid layer
The mid layer is usually made from fleece or wool. The layer works like an insulation layer. The idea is to keep the warm air close to your body. It’s good if the clothes have a tight fit, because it prevents the air from escaping from your body. I use a Tierra jacket and trousers made from Polartec® fleece material which are great for this purpose. On my feet I have Bridgedale Summit socks, that are designed for cold environments and they are mostly made of wool.
This weekend we had a meeting for our Svalbard expedition. The program included skiing and an overnight stay in tents at Päijänne in Padasjoki. I had an important family event on Saturday, so I took myself to the meeting late in the evening. It was a thoroughly “find the rest of the expedition on the lake of Päijänne” -mission for me. After a two hour drive up to Padasjoki I packed my sled at the Laivaranta harbour. I noticed it already had gone well past eight in the evening, so I had to make my way with the help of my headlamp. I took the course towards the elongated island Kelvenne, which was about 8 km from the harbour.
The weather could have been more Svalbard-like with lots of snow and temperatures well below zero … Instead I skied through slush and water up to my ankles, varying to hard ice surface were you only could go forward with double poling technique (finnish: tasatyöntö). After a two-hour ice skiing I found the camp! They had set up the tents on, what I believe, was the only snow patch of the entire Päijänne. My tent mates had our tent heated, so it was just for me to take off my skis and start to enjoy the evening. The idea of the whole exercise was that we would be able test the equipment we will be using in Svalbard, the most important perhaps the tent, and to meet our tent mates. We’ll stay three persons in a Helsport Svea 4 tent, and it seemed perfectly fine in terms of space. The rest of the expedtion members will share tents in pairs.
During the night, the big snow patch which was the base of our camp, had melted more, and there was now a proper swimming pool in our tent’s vestibule. In the morning it was getting colder, so after we took down our camp we skied off on a hard and icy surface. We tried, where possible, to take us to the shores where there was little snow, but the joy was not as long as we would cross a larger ice area and more slippery and hard ice surfaces. So double poling was the big thing again… We skied a litter longer route back to the harbour, and had a short after ski meeting at the nearby service station. The whole exercise was good training for the Svalbard expedition, and it was great to meet some of the other expedition members, and especially my tent mates! I think we are going to have an awesome expedition in March!
Our tent had quite a relaxed posture 🙂
Our camp on the one and only snow patch at Kelvenne.
Taking down the camp.
One of my tent mates leading the way.
The grip was non-existent on the slippery surface.
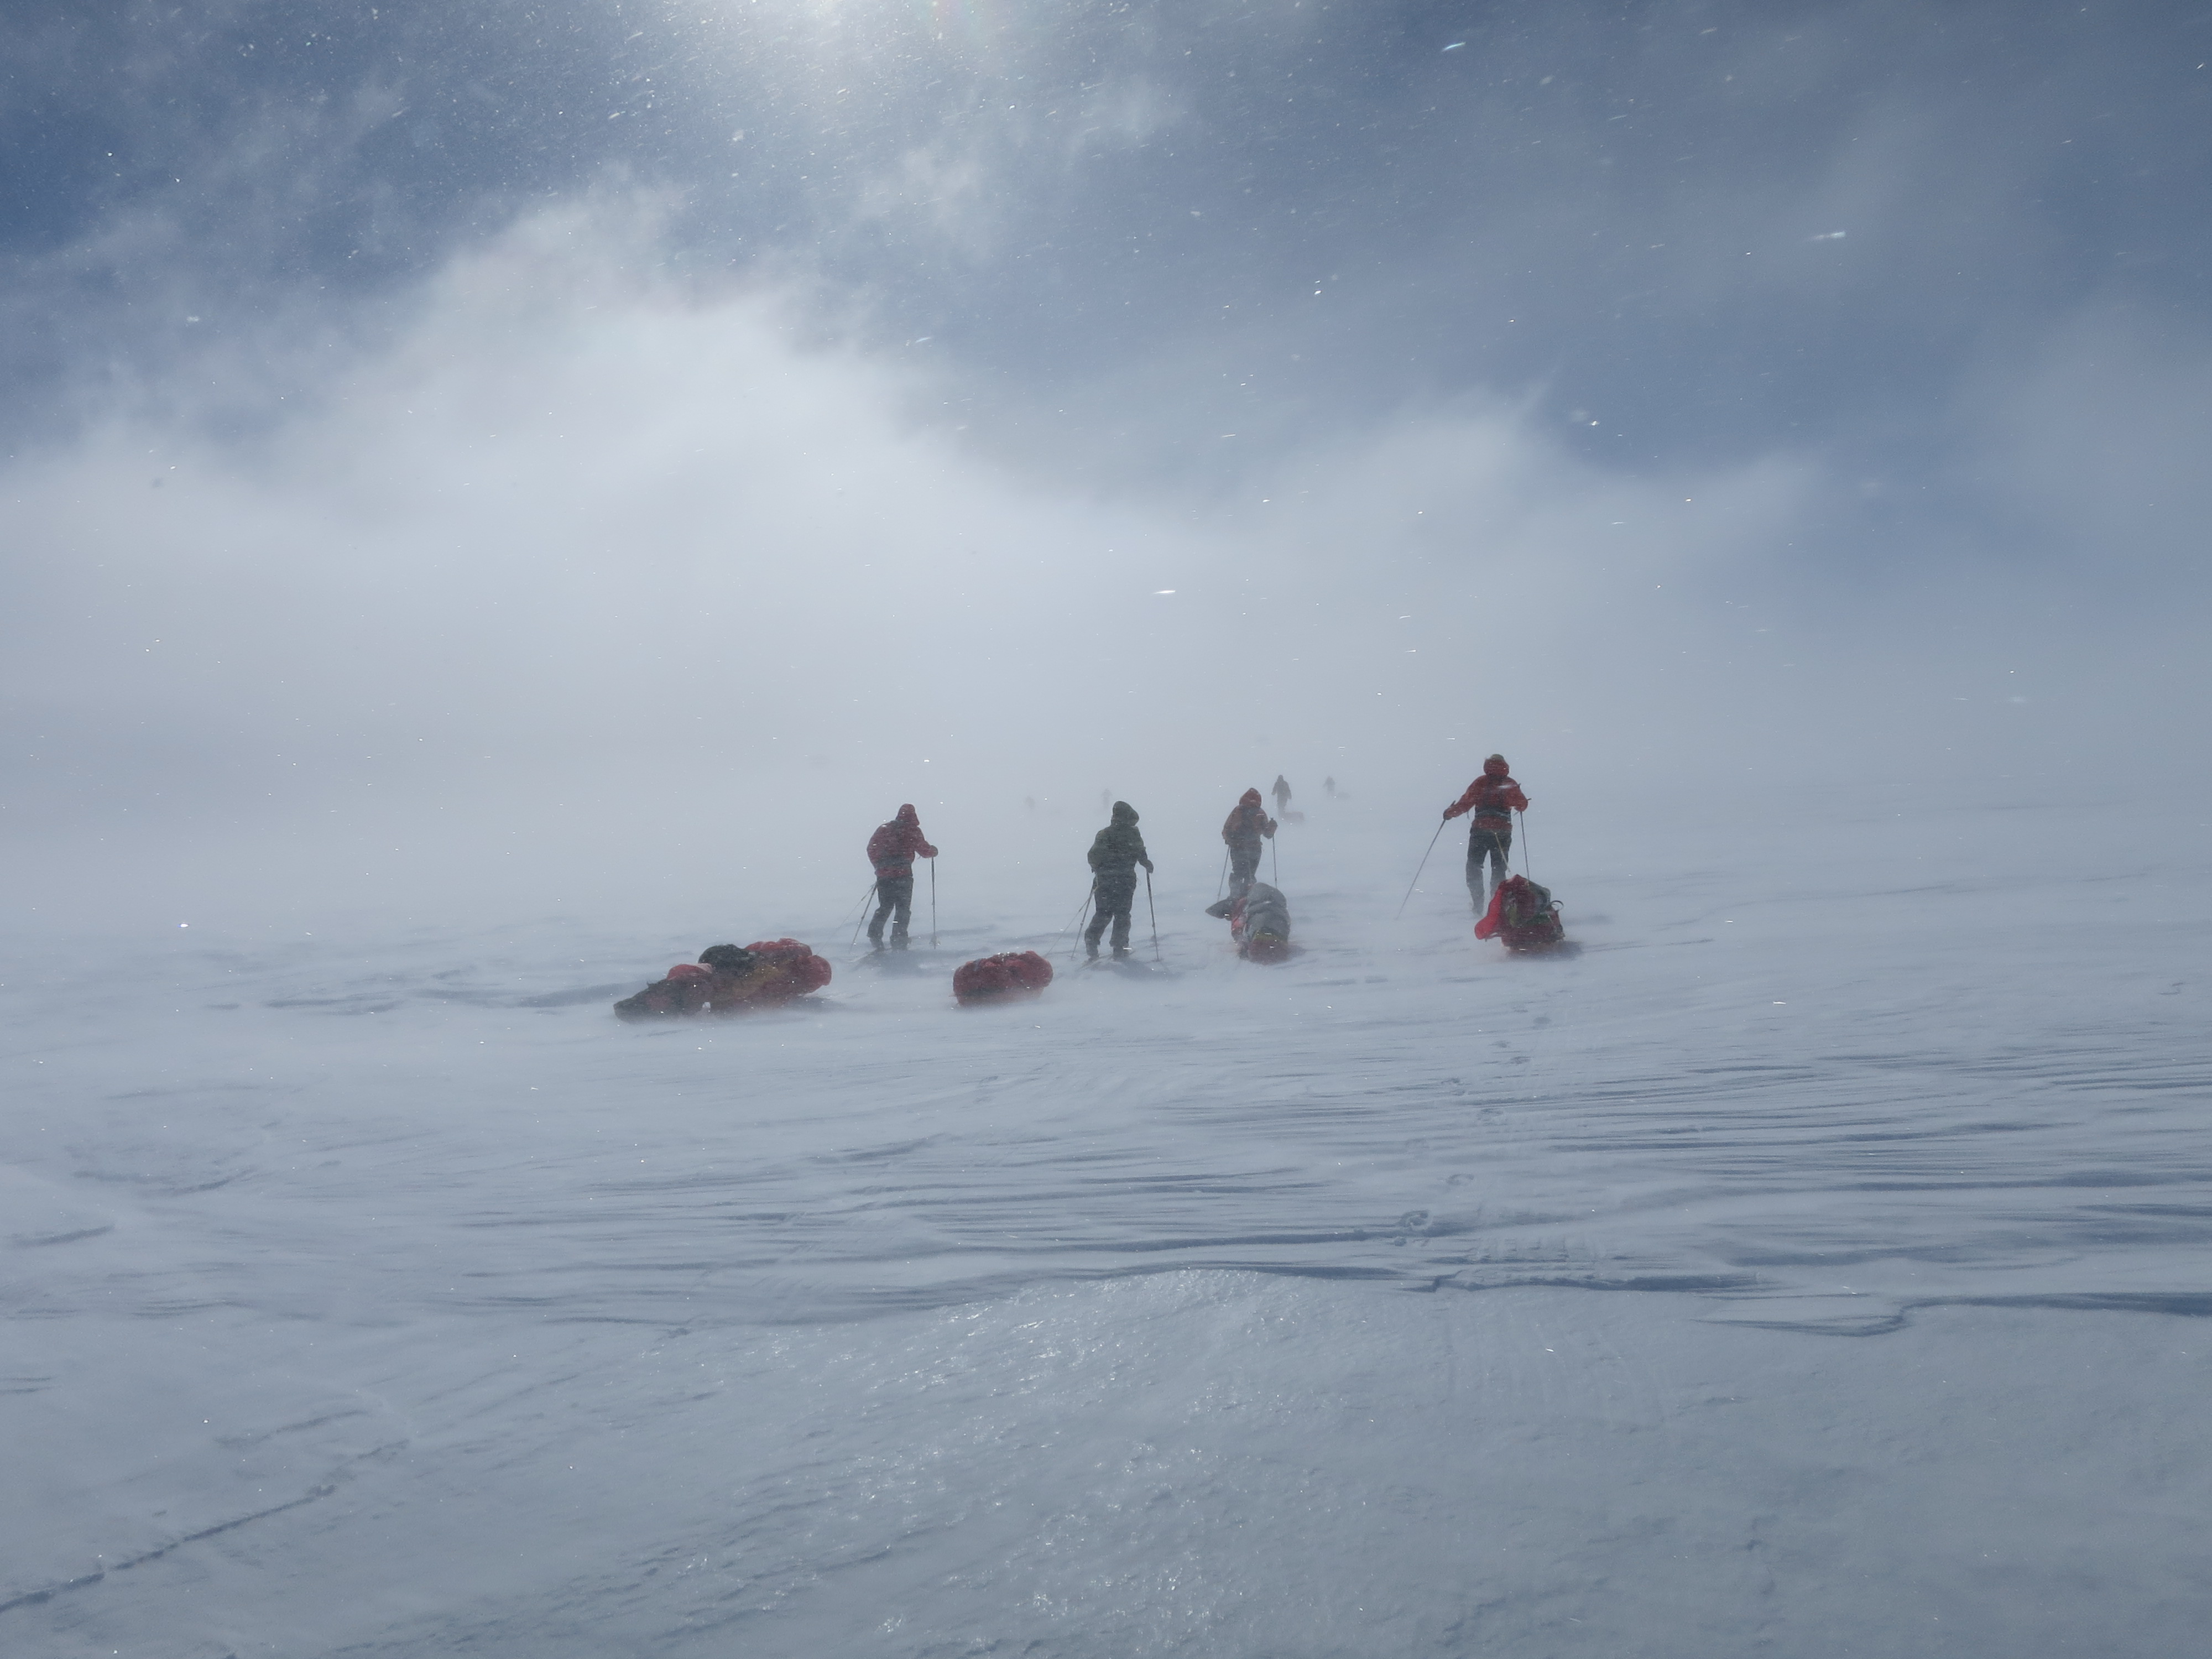
You can truly call this an extempore trip! I had no plans to travel abroad during the spring. Instead I was planning to spend the spring quietly at home with a few ski trips. For about a week ago those plans changed completely: I’m going to Svalbard for a ski expedition in the end of March for three weeks! Svalbard is a group of islands located about midway between continental Norway and the North Pole, and yes – there are polar bears walking around.
During these three weeks our plan is to ski about 300 km. We will start the expedition from the town Longyearbyen. If the weather is on our side the plan is to summit the highest mountain peaks Newtontoppen (1713 m) and Perriertoppen (1712 m). We will also visit Pyramiden, which is an abandoned Soviet mining town.
On a typical day we are going to ski about 7-8 hours and the night we are spending in our tents. The sledges will weight about 70-80 kg, but the sledges will get more lighter when the trip progresses.
Voilà! Here’s the final product: A box shaped pouch (medium size), so you can keep better track on your stuff in your backpack.
To pack things right when you are hiking or tour skiing, is completely a science of it own. Especially when you are going on a tour with a backpack on your back, it is good to think about how and in what you pack your stuff. You should have good order in your backpack to avoid going crazy trying to find something you do not know right where you’ve packed it. Waterproof pack bags with roll closures are good, but it’s hard to keep track of things in the bags, especially when the bags often tend to have small openings. It often happens that you have to empty the entire bag to find something, for example a headlamp. To keep a little better track of the smaller things I have come up to the following solution: Smaller things can be packed in box shaped pouches, that are sewn from a thin, lightweight fabric and has a long zipper, so you can see what you have in the bags without emptying them. I’m not a pro at sewing, so you can try this project safely!
The box shape will keep your stuff in place, and you can easily access all the stuff without emptying the whole pouch. This is the large version.
I purchased the fabric from Eurokangas in Tapiola. They had a big box full of different kinds of outdoor fabrics, so I had lots of options. I chose the fabric that seemed lightest but yet strong. From the same shop I got also the zippers.
Note: Depending on the fabric it can become more or less difficult or easy to do this project. I tested first with a fabric that had a plastic layer on one side, but it caused problems because the sewing machine did not pick up the lower thread, and therefore sewed empty. I tested with many different settings, needles and threads, but I did not get it to work. I do not know if the reason for this was the sewing machine or the fabric, or perhaps the sewer’s lack of experience…. With an other fabric, without the plastic layer, it worked just fine. You can use which measurements for the pouches that you want, but here’s the measurements I have used for the fabric:
Small: 32 cm x 19 cm Medium: 42 cm x 26 cm Large: 60 cm x 40 cm
The zipper has to be at least as long as the shorter side of the fabric.
When I’m out on longer tours, the food can become rather one-sided. I often prepare the food on some sort of kitchen with burners, pots and frying pans. This is the equipment the cooking is limited to. Sometimes during the trip, it is still fun to spice up the ordinary and make the food more luxurious. Nothing for example beats a fresh baked chocolate cake far away from civilization! The problem is that you don’t usually carry an oven with you, but fortunately there are several tricks to that. I tested one of these tricks, and for that you need the following:
• Trangia, pots and frying pan (lid). I recommend a Trangia with a gas burner.
• Disposable aluminium foil pan
• Chocolate cake dough
Say that you would like to bake a chocolate cake in the wild. Well, good news for you then! Grocery stores sells “ready to bake” flour mixtures of different sugar cakes. The only thing you need to add is oil and water. Then you just have to follow the instructions below:
Do you travel to areas where there is poor cell phone coverage? Have you thought how you in an emergency get help to those places, without any reception? Well, here is one option for you: SPOT.
You can get a SPOT for under 200€, but you also need a trace service to get your SPOT to work optimally, which costs around 100 € per year. Youcan get theolder SPOT modelless expensive, egMarinekauppa.comsellsthe older modelfor 99€.
The trip was organized by Ankarat Avotunturit. If you are interested in arctic expeditions I recommend you to check out their courses, programs and expeditons: Ankarat Avotunturit. If you want to read the blog we wrote from day to day on the glacier you’ll find it here: Blogi Vatnajökull (in Finnish).
I participated today in an evening at Yrjönkatu Partioaitta. Pata Degerman was host for the evening and the theme was winter touring. The emphasis was on clothing and equipment. Although some of the content was already familiar to me, I also learned new things. I got for example to see a Paris sled which was equipped in a slightly different way than my own. I also got a good tip on how to fix a protection around my thermos bottle, so it will not get dents what could cause heat leakage.
The eternal question, of what kind of sleeping bag to wear in winter, was also discussed. According to what I’ve learned from previous lessons and courses, you should have an inner down sleeping bag and an outer bag with a synthetic material. That should move the moisture away from your body through the down bag to the synthetic material. According to yesterday’s discussion it was recommended to only have one sufficiently thick down sleeping bag. But it hard to say what is right and what is wrong. As long as you don´t freeze it´s good. We also went into the subject on how to do when nature calls in a snow storm, and that it may be more difficult for ladies to go to the “bathroom” quickly without having to remove several layers of clothing. Well, now there is GoGirl on the market! I’m not going in on that subject more, but you can check out this link: GoGirl, and make your own opinion on how practical it would be.
This was a pilot evening, and we can hope for that Partioaitta is going to arrange more evenings like this in the future. This concept is great!
Scroll down for a an update on the review (1.3.2016)
6.11.2015
I bought a new tent! At first I had difficulties to choose which tent I was going to buy. I’ve had my Jack Wolfskin Eclipse II dome tent for several years, and I have actually been quite satisfied with it. The biggest issue has been the weight. It’s quite a small tent but weights up to almost 4 kg! It´s the poles that have the most weight, because they are heavy glass fiber poles with rubber coating. On the last trip to UKK it also made clear that the tent isn´t so good in any wind.
So, I wanted following features in my new tent: 1) lighter than 4 kg, 2) wind proof, 3) roomier, 4) the feature that the rain fly is attached to the inner tent when pitching the tent, so the tent keeps dry when pitching in rainy weather.
I first looked at some models of Hilleberg tents, but sadly my economy didn’t give in. At the XXL store they have Helsport tents, quite similar to Hilleberg models, but a little bit cheaper. I actually for a long time considered buying a Helsport tunnel tent. Then I found the Bergans Trollhetta 3 tunneltent at the same store. It was half the price of a Helsport tent, weight around 3 kg, the vestibule was roomie and the tent was made for three persons! At first I was a little bit skeptical because the tent was cheap compared to other tents, but I thought I would give it a try. It was at first difficult to find any information and reviews about the tent, but then I discovered that the tent model is called Bergans Rondane 3 in the U.S. and in some other countries. The previous model for the tent was called Bergans Compact Light 3, and it’s quite similar to the new one. I found some good reviews about the tent, and it was clear that the tent also was wind proof.
I think that the three-person tent is perfect for two persons, because on long trips it´s nice to have that extra room when sleeping and spending time in camps in the evenings. And of course it´s nice with a bigger vestibule so you have a bigger shelter when you cook and a roomie place to store your equipment over the night.
More specs and opinions about the tent come later when I have had time to pitch it for the first time.
UPDATE 1.3.2016:
The Bergans Trollhetta 3 tent was with us to Koli on a winter adventure. Here’s a quick review:
It was easy to set up, and with snow pegs in the short ends, we got the tent firmly standing on snow. When we pitched the tent the temperature was 0°C or warmer, and the snow was pretty loose. During the night it had snowed and the tent had a a layer of wet snow in the morning and also the rain fly had become looser. We got the tent tight by tightening the guy lines. Inner tent hung still a lot, and it was hard to get tense.
In the evening the temperature had dropped to below freezing, and when we tightned guy lines for the night I noticed that the loop that the guy line runs through had frozen solid so that half of the guy rope became loose (see picture). The tent was held tense until the morning because the loop was still frozen, but if the weather would have become warmer the rope would have dissolved and the tent would have lagged together.
As previously mentioned, I’m super happy that I chose the three-person tent, because it is really crowded for three persons, but perfect for two. But if you have all your stuff in the big vestibule, there is enough room for three persons. In the foot end, there is not much space, either sideways or upwards, so here you easily kick the inner tent against the rain fly. If you’re tall, the length of the tent can be a problem. If it’s snowing, the heavy snow can push the rainfly against the innertent, and your feet cam accidentally push the innertent against the rainfly.
We had both of the ventilation open when we slept, and in the morning there was only a little frosty condensation on the inside of the tent. So in winter conditions the tent’s ventilation works apparently fine. In the summer the dark color of the tent can cause it to be too hot in the tent during calm weathers if the sun shines directly on the tent.
Read also the comment section below.
UPDATE 1o.5.2016:
Here is a new update of the tent. This time the tent’s fabric is in focus. I pitched the tent on a hot day and the tent looked perfect. The fabric was tense and there were no folds or loose facric. It was over 20°C and the sun shone straight on the tent. Inside the tent it was even warmer. A little too hot. Although I had all the vents open and the door open, it felt as if the air was kept really still in the tent, although there was a slight breeze outside. So this is not a cool summer tent, mostly because of the dark tent fabric.
In the evening, when the sun went down and the humidity rose, the tent began sagging together. In the pictures you can compare how the canvas reacts. Now this is just the difference between day and evening. At the night it was even more loose. I also wonder how the canvas then reacts in rainy weather if the fabric stretches this much only of relative humidity.
Project Aluminium box began when I few weeks ago hatched out of me the following: ” How hard can it be to a build a box for two burners?”. You can by boxes that are made specially for this purpose, but they costs nearly 150 €! Sure, it also would be possible to rent a box for the trip. Dad promised nevertheless to help with the construction. He did not know for sure what he had settled in on. So the project started! The result, which was better than expected, you can see below. Somethings is yet to be fixed, so it is not completely finished.
Planning in progress.
Drawings for the project.
The base for the box.
A lid and a front hatch with piano hinges.
Place for bottle and burner 1.
Place for bottle and burner 2. (The pot is in the burner’s place.)
Photo additions to the post: This is how the finished product looked like:


")


