To pack things right when you are hiking or tour skiing, is completely a science of it own. Especially when you are going on a tour with a backpack on your back, it is good to think about how and in what you pack your stuff. You should have good order in your backpack to avoid going crazy trying to find something you do not know right where you’ve packed it. Waterproof pack bags with roll closures are good, but it’s hard to keep track of things in the bags, especially when the bags often tend to have small openings. It often happens that you have to empty the entire bag to find something, for example a headlamp. To keep a little better track of the smaller things I have come up to the following solution: Smaller things can be packed in box shaped pouches, that are sewn from a thin, lightweight fabric and has a long zipper, so you can see what you have in the bags without emptying them. I’m not a pro at sewing, so you can try this project safely!

I purchased the fabric from Eurokangas in Tapiola. They had a big box full of different kinds of outdoor fabrics, so I had lots of options. I chose the fabric that seemed lightest but yet strong. From the same shop I got also the zippers.
Note: Depending on the fabric it can become more or less difficult or easy to do this project. I tested first with a fabric that had a plastic layer on one side, but it caused problems because the sewing machine did not pick up the lower thread, and therefore sewed empty. I tested with many different settings, needles and threads, but I did not get it to work. I do not know if the reason for this was the sewing machine or the fabric, or perhaps the sewer’s lack of experience…. With an other fabric, without the plastic layer, it worked just fine. You can use which measurements for the pouches that you want, but here’s the measurements I have used for the fabric:
Small: 32 cm x 19 cm Medium: 42 cm x 26 cm Large: 60 cm x 40 cm
The zipper has to be at least as long as the shorter side of the fabric.
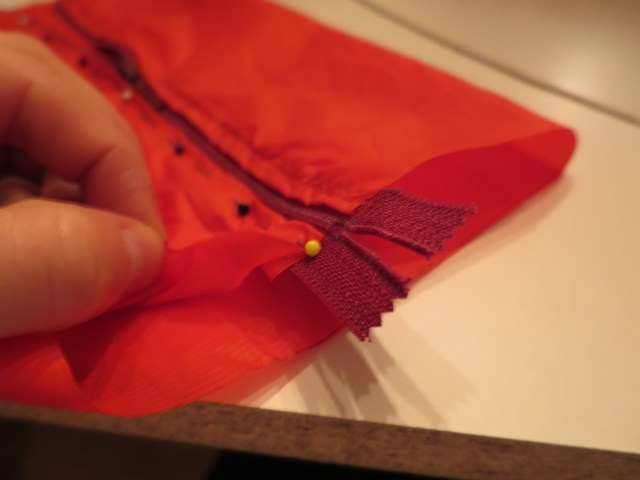
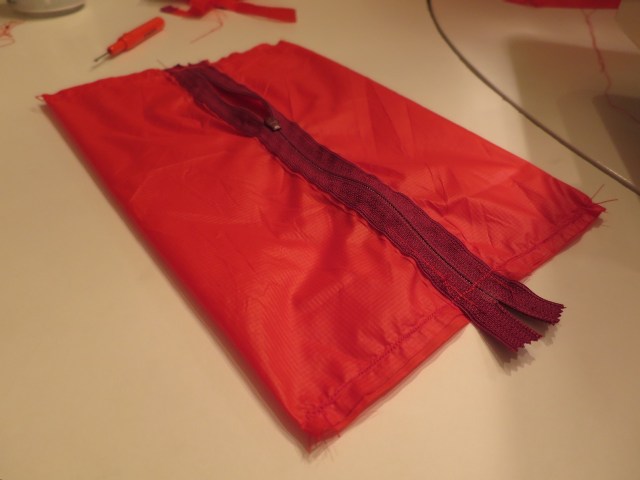
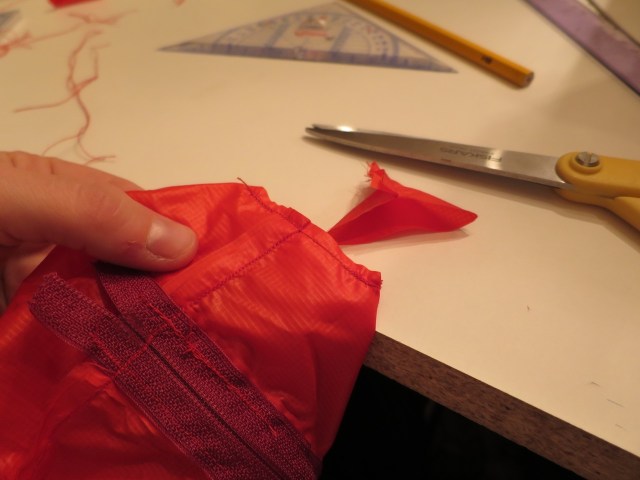
Here are the steps and pictures for the project:
Supplies: Outdoor fabric, Zipper, Thread.